4 Ways to Upload Files on Google Drive
With over 2 billion users, Google Drive has become one of the most popular cloud storage platforms. Its ability to keep files securely synchronized across devices makes Google Drive a convenient place to store everything from documents to photos to videos.
But, you can get more out of this powerful platform by understanding these four key ways of uploading files and folders. With file sizes ranging from a few kilobytes to multiple gigabytes, not all uploading methods are suited for every situation. So, here are four methods of uploading files to Google Drive that can fit any of your needs.
Method #1: Upload Small Files on Google Drive’s Home Page
The most straightforward way to upload files to Google Drive is through the drive.google.com web interface.
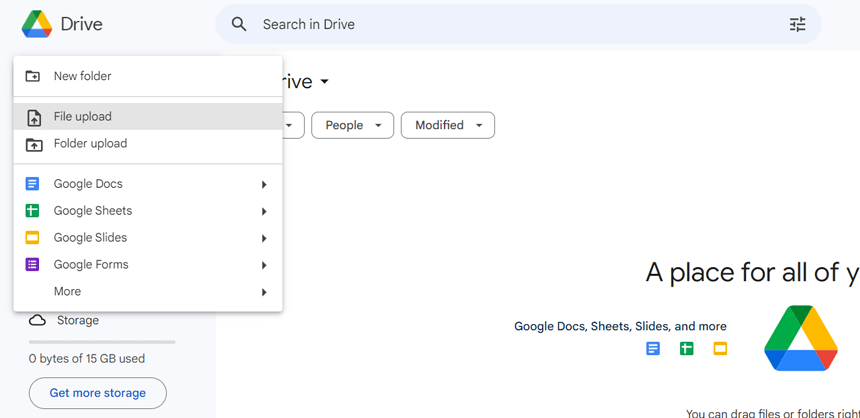
To upload files using this method, go to drive.google.com and click on the "New" button in the top left corner. Select "File upload" from the dropdown menu. This will open a file selection window where you can drag and drop files from your computer into the browser window. You can also click "Select files from your device" to browse and choose files to upload from your local folders and directories.

Files less than 5GB in size can be uploaded for free through this browser-based method. As the files upload, you'll see a progress bar for each individual file and notifications upon completion. Uploaded files are then accessible through the Google Drive web interface, mobile apps, and any linked computers.
This basic upload method works well for quickly getting a few files or documents into your Google Drive storage. It's simple, fast, and ideal for on-the-fly uploads.
Method #2: Compress Folders Then Upload Them to Google Drive
If you want to upload entire folders with large files, it can be helpful to first compress the folder into a ZIP file before uploading. This reduces the overall size being transferred and ultimately saves storage space in Google Drive compared to uploading an uncompressed folder.
To create a ZIP file on Windows, right-click on the folder and select "Send to" then "Compressed (zipped) folder". On Mac, right-click the folder and choose "Compress [folder name]". This creates a .zip archive containing all the folder's contents in a compressed format that reduces the size of the folder. The .zip file can then be uploaded to Google Drive through the basic upload flow.
When opened, Google Drive automatically extracts the archive and recreates the original folder structure. Zipping folders before upload lets you transfer large batches of files while minimizing the used storage quota. It's a simple trick for condensing folders before uploading to Google Drive.
Method #3: Use the Google Drive Desktop App to Upload Files
For extremely large uploads like entire folders with gigabytes of files, the Google Drive desktop app provides the most efficient transfer method.
The desktop app creates a special Google Drive folder on your local computer. Any files added to this folder will automatically sync and upload to your Google Drive storage online.
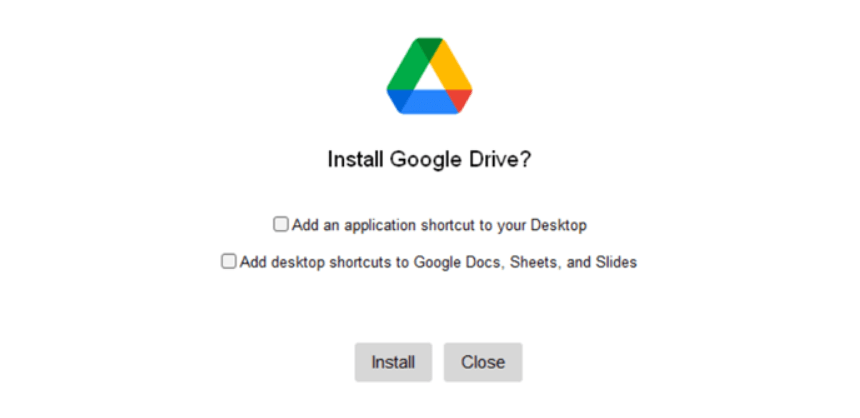
To get started, download and install the Drive for Desktop app. Once set up, simply drag and drop files or entire folders from your computer into the Drive folder. The desktop app will then upload everything in the background to the cloud. You can monitor upload progress and view the current sync status through the desktop app interface.

Method #4: How to Receive Files with Google Drive Upload Apps
While you can share a folder with another person giving them access to upload to the folder, this also gives them access to the other files within the folder. So, how can you receive files to a Google Drive folder without giving uploaders access to the folder?
You can use DriveUploader. With DriveUploader, you can create a link that allows anyone with the link to upload files and folders into your Google Drive. This allows you to receive files from others without giving them access to the folder they are uploading to.
To get started, you simply create an account on driveuploader.com and connect it to your Google Drive storage. Once connected, you can generate an uploader link to any of your Google Drive folders that you can share with others. Anyone with the link can then visit the page and drag and drop files and folders into their web browser to upload directly to your Drive.
DriveUploader supports file transfers up to hundreds of gigabytes as long as it fits within your Google Drive storage quota. It uses secure HTTPS connections for protecting data. There are also no limits on how many files can be uploaded through each link.
How Should You Upload Files on Google Drive?
When uploading files to Google Drive, the best method depends on your specific use case and file types.
For quick transfers of documents or other small files, the basic Google Drive web upload is the easiest option. Just drag and drop up to 5GB per file and they will quickly sync to your account.
If you need to upload entire folders, especially those with large amounts of data, first compress the folder into a ZIP file. This condenses the size before uploading and ultimately saves storage space compared to uploading the uncompressed folder.
The Google Drive desktop app simplifies large batch uploads like entire project folders containing many GBs worth of files. It lets you seamlessly drag and drop folders to your synced Drive for automated uploading and two-way syncing.
Anytime you need to receive files from others in your Google Drive, you can use DriveUploader to generate a link that allows anyone to upload files to a specified folder. This allows you to receive files from others without giving them access to any of your Google Drive files.
Whether you need to quickly add a document, sync entire projects, or allow others to send files to your Google Drive, there’s an upload method for you.
For more insights, check out these tips for efficient file sharing on Google Drive to make the most of your storage.


