How to create a file uploader for WordPress
Collecting data from your WordPress website directly to your Google Drive will boost your work performance, save you money, and improve your level of security.
Why use a file uploader for your website?
A file uploader allows anyone to submit content to your Google Drive directly, such as images, videos, documents, and other files. File upload field on your website can save you a lot of time and money that you would otherwise use to communicate with users.
Using a file uploader can enable user-generated content such as testimonial, review, or image and video. However, there are many scenarios across industries where it is appropriate to collect data through a file uploader:
- Job applications sent to you via the website can be saved directly to the relevant folder in Google Drive.
- Extension of your order system when you sell a product or service where it is necessary to get a file from your user. The typical use case for print shops or creatives.
- Review or testimonial uploader to get feedback from your users.
- Customer support uploader so your users can attach documents and help you to find out and solve the issue.
- Uploader for schools and universities to make education modern and gain time to teach.
- Videos and photos submitted by users of the event such as weddings, holidays, or church services .
There's no limit to creativity, and you'll find your own way to save a lot of time by collecting data directly into Google Drive.
Before you begin
The appropriate subscription plan for you is based on your usage and the scope of the integration, which can be found below. You can also swiftly compare plan options on our plans & pricing page.
How to implement the uploader into your WordPress
To implement the file uploader to your WordPress website check out the instructions below.
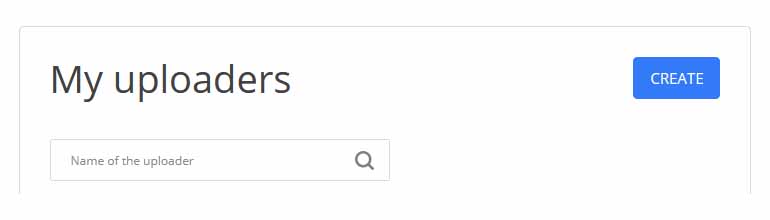
Step 1: Create the file uploader
Sign in to DriveUploader for free and go to my uploader page where you find the CREATE button. During the creating process, you can configure additional options such as custom form, language, quantity, or upload size. If you want to know more about creating a new uploader follow this link.
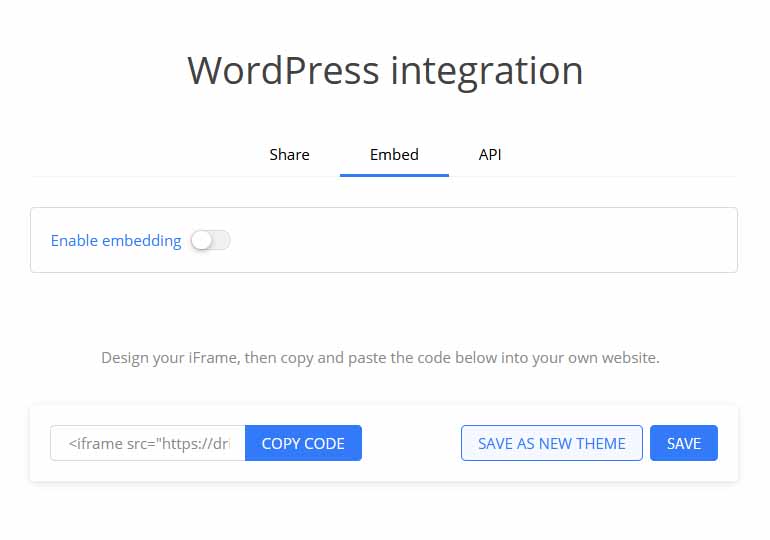
Step 2: Embed your file uploader to your website
Once you have successfully created and configured the uploader, you can begin using it immediately. Clicking on the uploader's name in the list of uploaders will open the page with sharing options. Please, open the embed tab.
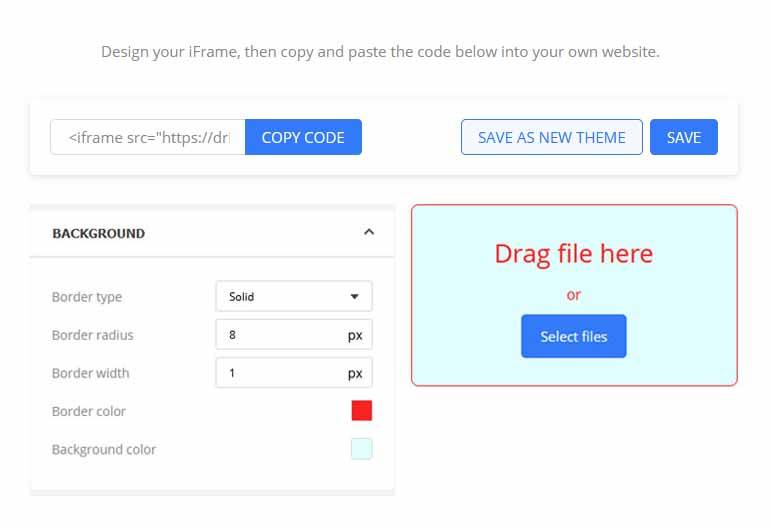
If you want to design the uploader for your brand feel free to adapt the style of the uploader as you need. Then, don't forget to save the new design. For more details about styling the uploader click this link.
After that, on the same page, enable the embedding and copy the iFrame code. Finally, log in to the WordPress administration and find the edit option for the page you want to add the uploader to.
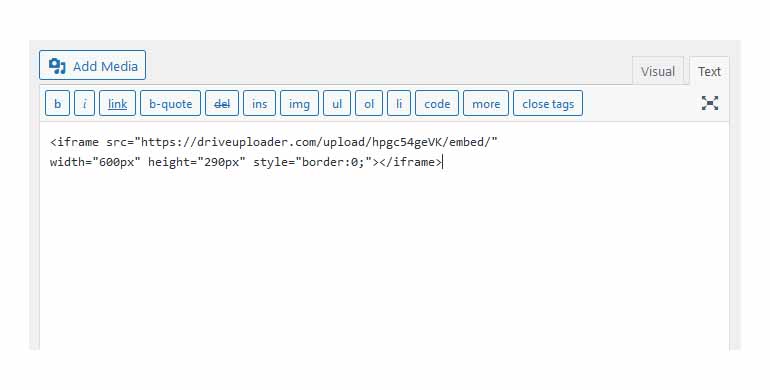
Switch the content of the page to the HTML editor and insert the iFrame code wherever you need.
Publish a page and enjoy the extra time you have thanks to the DriveUploader file uploader.
DriveUploader collects more than just files
Customer data is an invaluable asset for any company, and the ability to collect and customize this data easily and quickly is a significant advantage. With DriveUploader's tool Form Builder, you can display the custom form before each upload. Explore the Form Builder and collect everything you need.