Simplify file collection on your Squarespace website with DriveUploader
Are you looking for a convenient way to receive files from your website visitors? With DriveUploader, you can set up a professional file upload solution that allows users to send documents, images, videos, or other files directly to your Google Drive. This guide will show you how to embed DriveUploader into your Squarespace site to streamline file collection and make your workflow more efficient.
Why use DriveUploader with Squarespace?
Squarespace offers stunning website designs and a powerful platform for building your online presence. However, its file upload capabilities are limited when it comes to integrating with external services like Google Drive. By embedding DriveUploader, you can easily collect files and have them delivered to your Drive without any manual effort.
Advantages of using DriveUploader with Squarespace:
- Direct file delivery: Files are uploaded directly to your Google Drive, making organization a breeze.
- Customizable upload forms: Tailor your upload page to include specific fields like name, email, or file description.
- User-friendly experience: Visitors can upload files without leaving your site, ensuring a seamless process.
- Workflow automation: Pair with tools like Make.com or Zapier to automate tasks such as renaming files or sending notifications.
Follow these steps to integrate DriveUploader into your Squarespace site:
Step 1: Create and customize your upload form
- Set up your account: Head to DriveUploader.com and either create a new account or log in.
-
Build your upload page:
- Click “Create” to design your uploader.
- Specify details such as file types, maximum upload size, and any additional fields to collect user information.
-
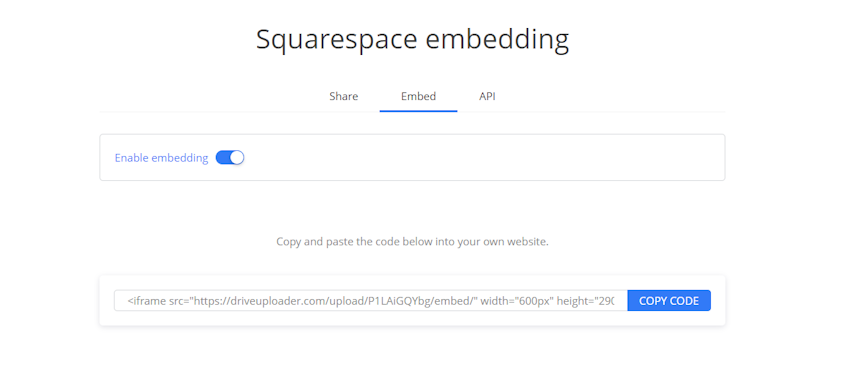
Copy the embed code: Once your form is ready, DriveUploader will generate an HTML embed
code for you.
Step 2: Embed the form into Squarespace
- Log in to Squarespace: Access your Squarespace account and go to the page where you want to place the upload form.
-
Add a Code Block:
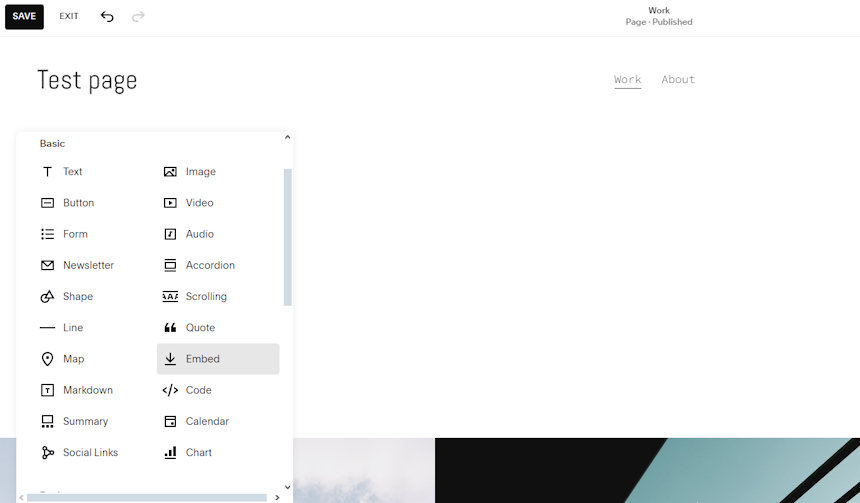
- Click the “+” button or “Add block” option on your page editor.
- Choose the Embed Block option from the available blocks.
-
Paste the Embed Code:
-
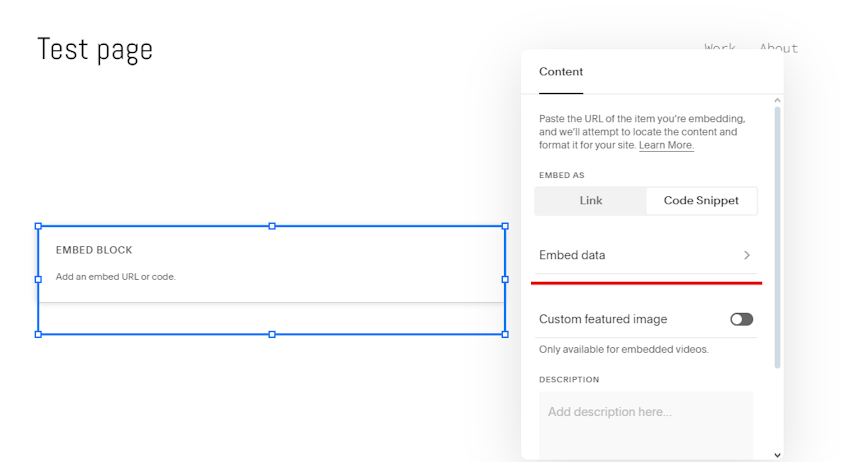
In the code editor, select the Code Snippet and click on Embed data.
-
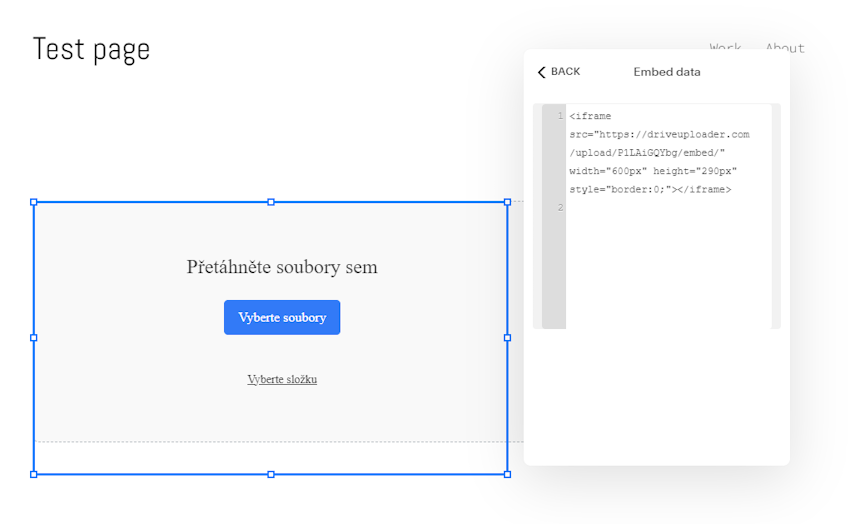
Paste the generated code into the selected area
-
In the code editor, select the Code Snippet and click on Embed data.
- Adjust placement and size: Move and resize the code block to ensure the upload form fits well with your page layout.
Step 3: Test and optimize
- Preview your page: Use the preview mode in Squarespace to see how the form looks and functions on your site.
- Perform a test upload: Try uploading a sample file and confirm that it appears in the correct Google Drive folder.
- Tweak if necessary: Adjust the placement, size, or styling of the form as needed.
Tips for enhancing your file upload solution
- Customize the design: Modify the embed code to align the form with your website’s branding and aesthetic.
- Automate your workflow: Use automation tools like Make.com to rename, organize, or notify you about uploaded files.
- Provide confirmation: Redirect users to a thank-you page or show a success message after their file upload is complete.
Why DriveUploader is perfect for Squarespace users
By integrating DriveUploader, Squarespace users can effortlessly manage file submissions. Whether you’re collecting job applications, client files, or creative content, this solution ensures a professional and efficient process. With its direct integration to Google Drive, you can keep your storage organized and focus on what matters most.