How to integrate Make and DriveUploader
Introduction
Managing uploaded files and ensuring they are correctly organised can be a time-consuming task. With DriveUploader and Make.com, you can automate these processes to save time and minimize errors. This tutorial will guide you step-by-step on how to set up an integration that automatically renames uploaded files in Google Drive based on form data from DriveUploader.
Whether you're managing client submissions, team projects, or student assignments, this automation ensures that every file is stored with a clear and consistent naming convention—no manual effort required!
By the end of this guide, you’ll have a working system that:
- Collects user-submitted data (Name, Surname, and File Value) using DriveUploader.
- Saves the data into a Google Sheet.
- Matches and renames files in Google Drive based on the collected data.
Let’s dive in!
Tools you’ll need
To complete this tutorial, you’ll need the following tools:
-
DriveUploader account
- Used to create the custom uploader form and specify the destination folder for file uploads.
-
Google Workspace
- Google Sheets: To store data collected via DriveUploader.
- Google Drive: To manage and rename uploaded files.
-
Make.com account
- To create the automation scenario connecting Google Sheets and Google Drive.
-
A test file for upload
- To verify that the automation works as expected.
Step 1: Create an uploader in DriveUploader
- Log in to your DriveUploader account.
- Click on "Create" and follow the prompts.
-
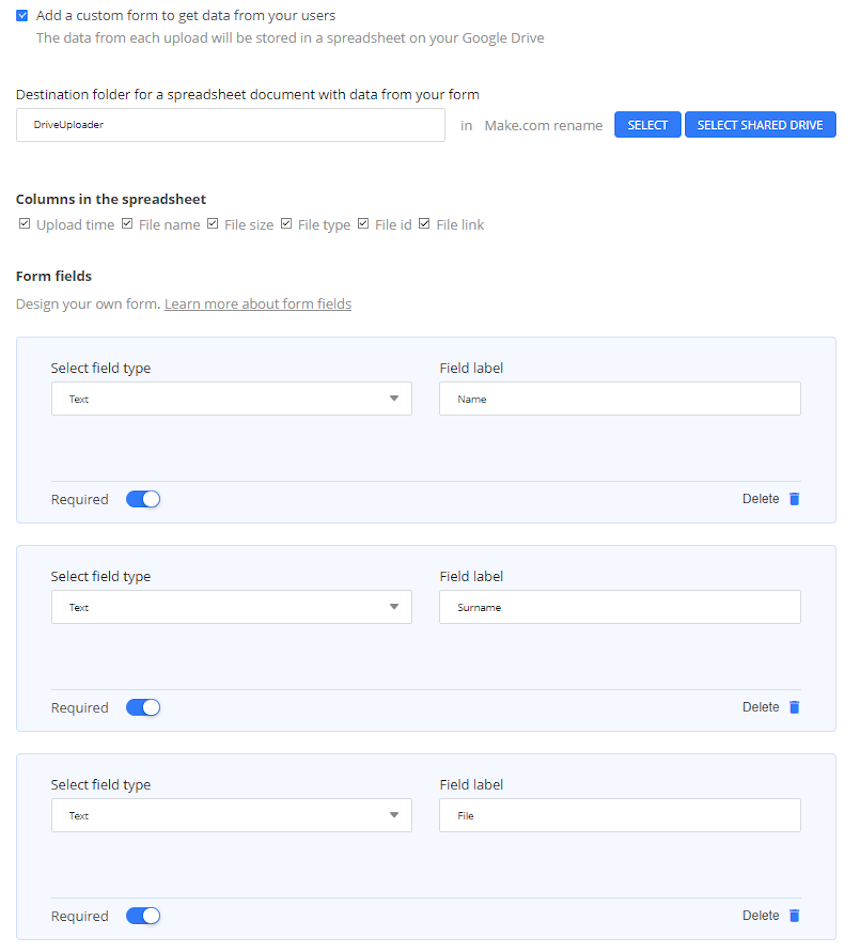
Customize the uploader form:
- Add fields for Name, Surname, and File.
- Ensure all fields are mandatory for better data accuracy.
- Set the destination folder in Google Drive where uploaded files will be stored and also where Google Sheets with form data will be stored
Step 2: Set Up a Make.com scenario
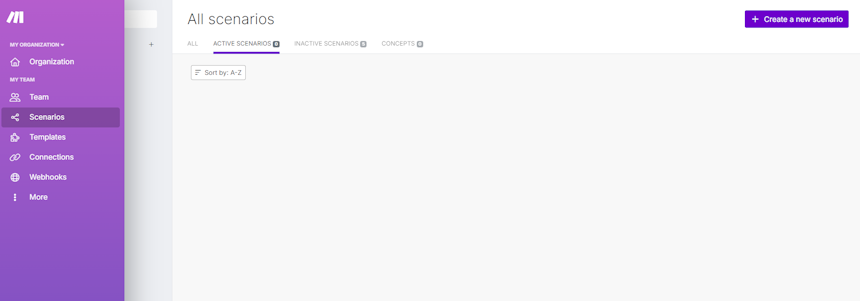
- Log in to your Make.com account.
- Click "Create a new Scenario" and choose the starting point for your workflow.
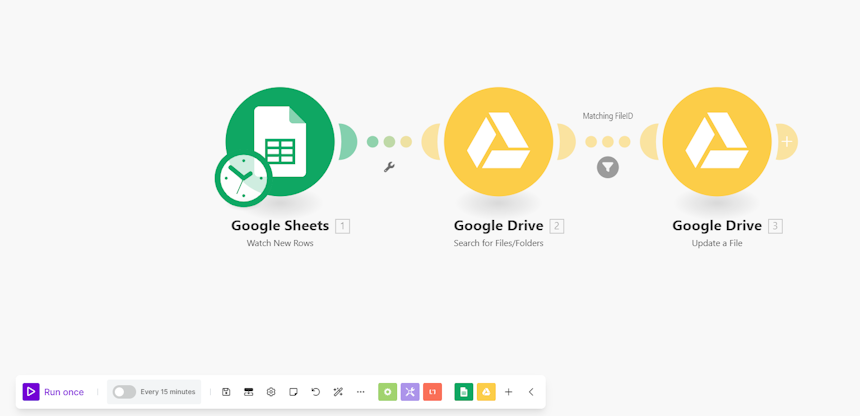
Step 3: Add the Google Sheets module
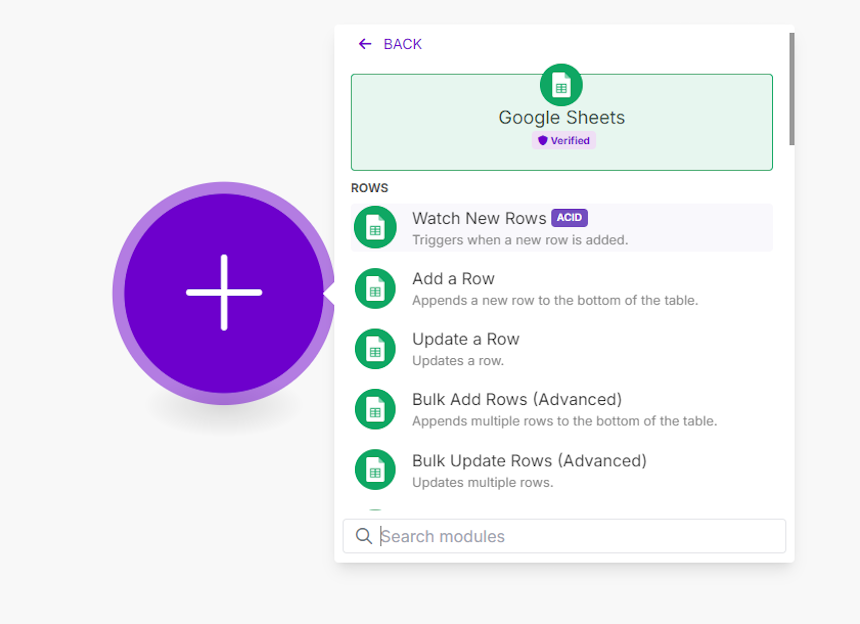
-
Search for and select Google Sheets > Watch New Rows as the first module.
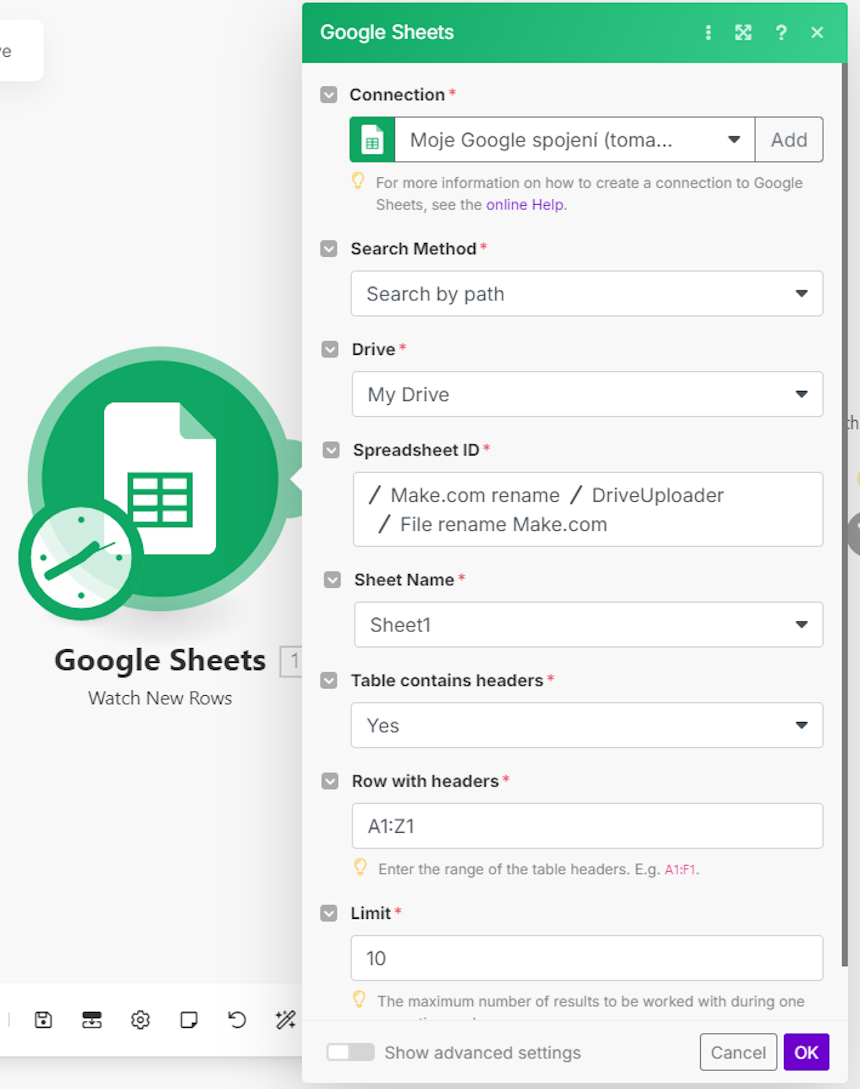
- Connect your Google account and select the spreadsheet linked to your DriveUploader form.
-
Select the Spreadsheet ID by following the destination, where this file is saved on your Google Drive. Then
select the desired Sheet name and confirm, that your table has headers
-
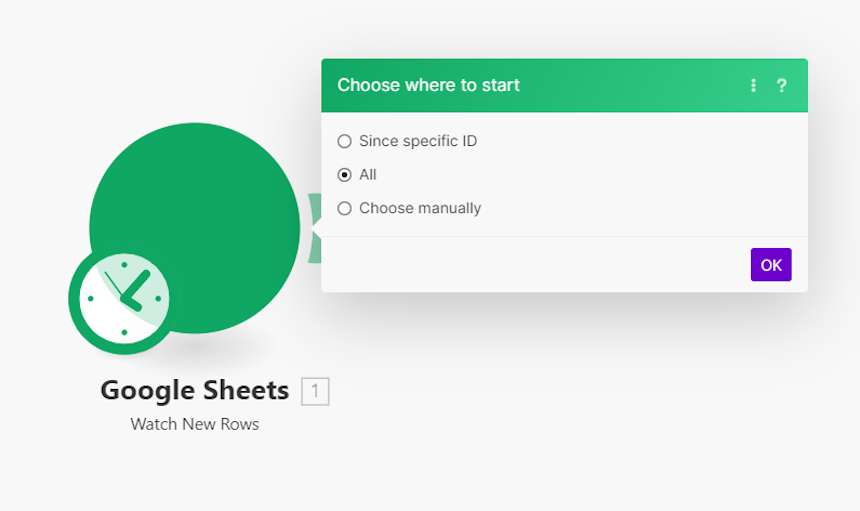
Select all if you want to rename all files that were uploaded via the uploader and have
some record in the Google Sheet.
Step 4: Search for files in Google Drive
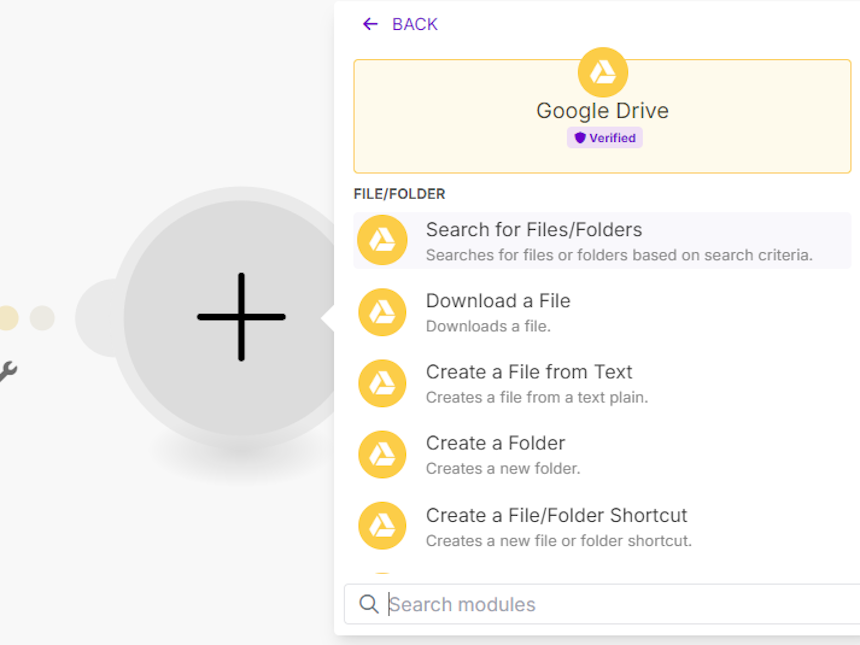
-
Add a Google Drive > Search Files/Folders module to the scenario.
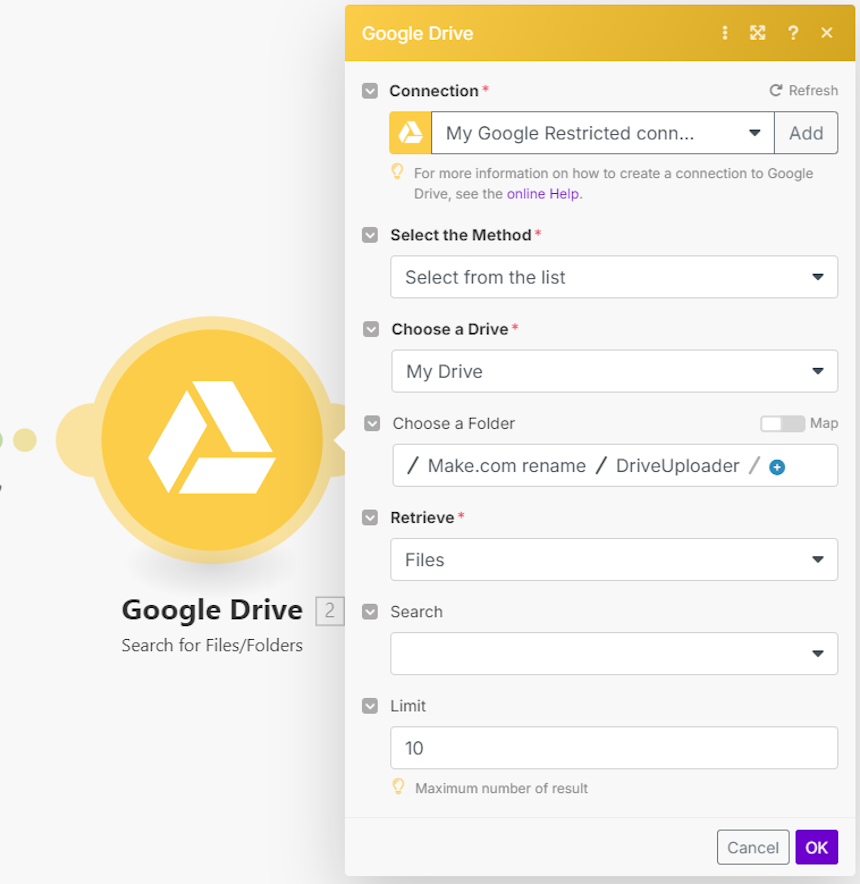
-
Specify the Google Drive folder set which is set as a destination for your Uploader.
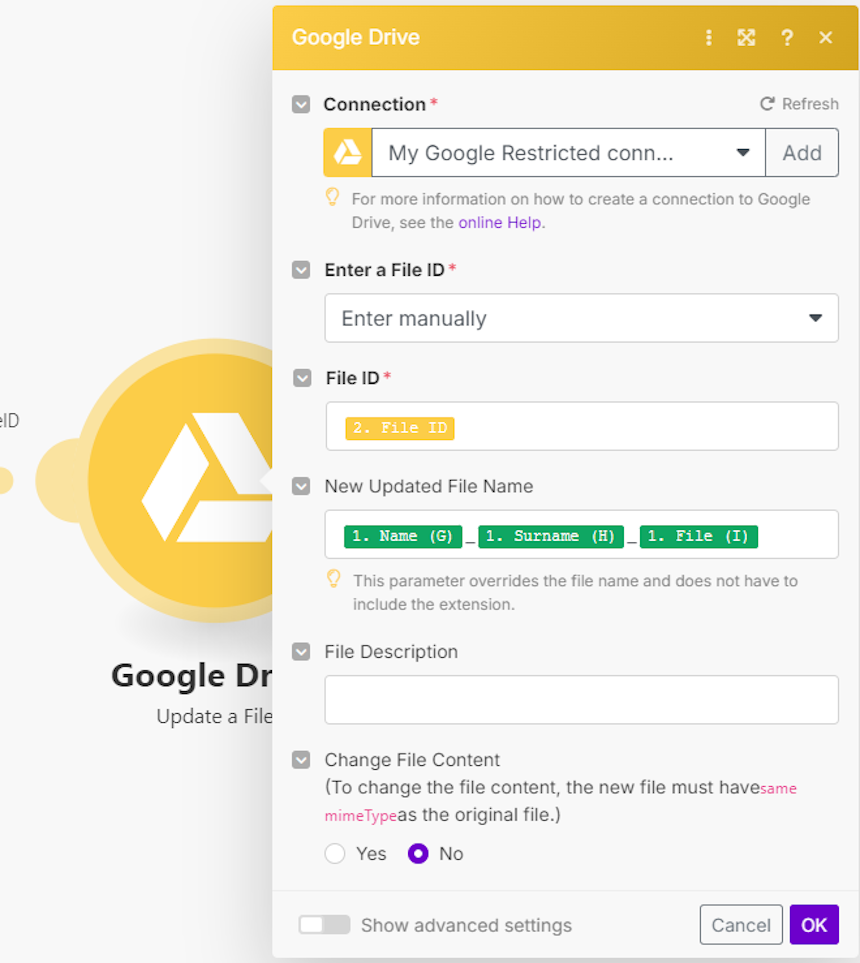
Step 5: Rename the file in Google Drive
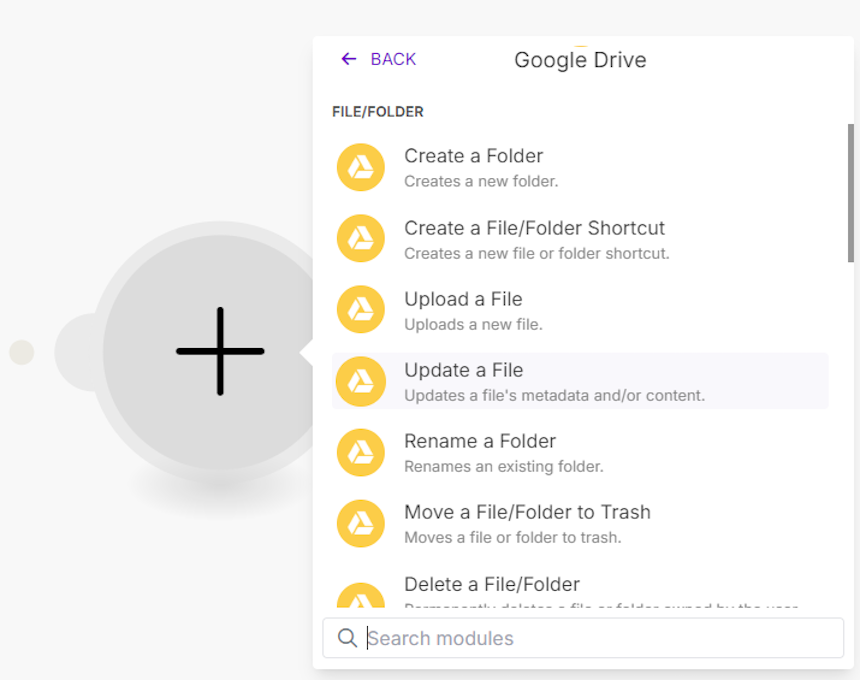
-
Add a Google Drive > Update a File module.
-
Map the following fields:
- File ID: From the matched file in Google Drive.
- New File Name: Use the fields from the Google Sheet to create a naming format, e.g., Name_Surname_File.
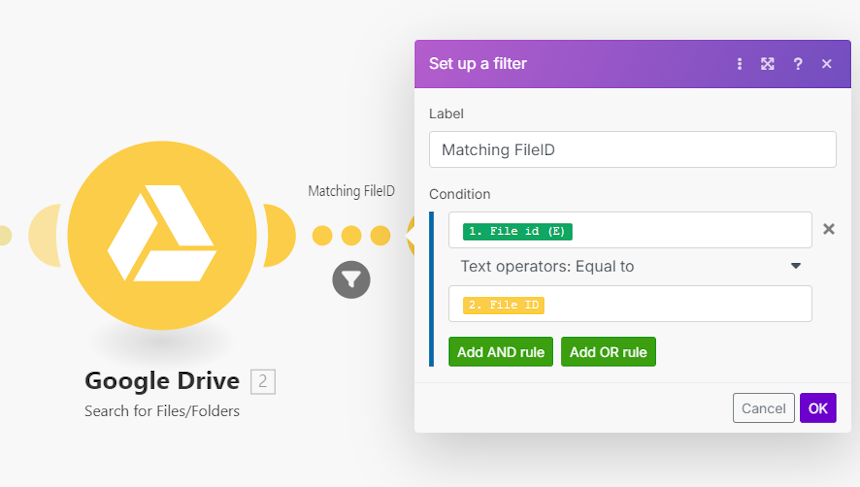
Step 5: Apply a filter for matching file IDs
- Add a filter between the second and third Google Drive modules.
-
Set the condition:
- File id (from Google Sheet) Equals to File ID (from Google Drive)
Step 6: Test and activate the scenario
-
Upload a sample file via the DriveUploader and check:
- Data in Google Sheets.
-
Run the scenario manually by Run once to test the integration and check:
- File renaming in Google Drive.
- If successful, activate the scenario to run automatically.
Conclusion and next Steps
In this tutorial, we demonstrated how to integrate DriveUploader and Make.com to automate file management in Google Drive. Here’s a quick recap of what we achieved:
- Created a Custom Uploader in DriveUploader to collect Name, Surname, and File Value from users.
- Stored Form Data in a Google Sheet for easy tracking and automation.
-
Set Up a Make.com Scenario to:
- Watch for new rows in Google Sheets.
- Match uploaded files in Google Drive with corresponding form data.
- Rename files based on user inputs for consistent organisation.
With this setup, you’ve automated a tedious file management process, saving time and reducing the chance of errors.
Who can benefit from automated file renaming?
This system is valuable for anyone managing large volumes of uploads. Here are some examples:
-
Educational institutions
- Automatically rename student assignments using their name, course, and assignment title.
- Example: John_Doe_Math_Homework1.pdf.
-
Freelancers and agencies
- Organise client-submitted materials with a consistent format, such as ClientName_ProjectName_Date.png.
- Perfect for design agencies, marketing teams, or consultants.
-
HR and recruitment teams
- Rename resumes and job applications by candidate name and position applied for.
- Example: Jane_Smith_SoftwareEngineer_Resume.pdf.
-
Event organizers
- Rename uploaded files from participants, such as registration forms or competition entries.
- Example: John_Doe_PhotoContest2024.jpeg.
-
Healthcare and legal professionals
- Use the system to rename sensitive documents, such as PatientName_Report_Date.pdf or CaseNumber_DocumentType.pdf.
More use cases for renaming files
With small modifications, this setup can be adapted for:
- Timestamped File Names: Include upload dates or times for chronological organization.
- Example: ClientName_Invoice_2024-11-27.pdf.
- Batch Renaming: Process multiple files in a single run, using batch-specific identifiers.
- Custom Categories: Add metadata tags based on user-provided details, such as department or project type.
Take the next step
Renaming files is just the beginning! This workflow can be customized to fit virtually any file management need. Start using it to improve your operations, and feel free to expand it further with more advanced features like folder organization or sharing automation.