How to set up custom notifications in DriveUploader
DriveUploader allows you to configure custom email notifications for both admins and uploaders. You can specify multiple recipients, customize the subject and message, and use variables to include dynamic information. This ensures that all stakeholders are informed about file uploads in real-time.
1. Where to find notification settings
- Log in to your DriveUploader account.
- Open the settings of the uploader for which you want to enable notifications.
- Navigate to the Notifications section.

By enabling notifications, you ensure that relevant parties receive timely updates about file uploads. This can help with tracking submissions, improving workflow efficiency, and maintaining a record of uploaded files.
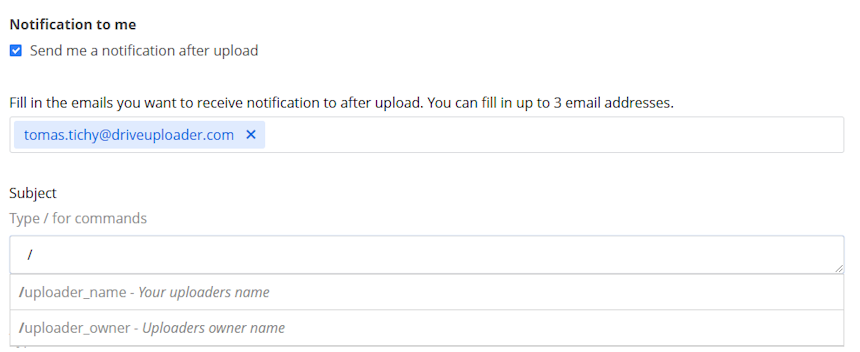
2. Enable notifications for me
- Toggle the Send me a notification after upload option.
- Enter up to three email addresses where the notification should be sent.
- Ensure that the recipients you enter are those who need to monitor file uploads regularly.
Customize the email subject
- Enter a subject for the notification.
- Use the "/" command to insert variables. Available options:
- Uploader Name – Displays the name of the uploader.
- Uploader Owner – Shows the owner of the uploader.
📌 Example:
New Upload in /uploader_name - Managed by /uploader_owner
A well-structured subject line helps recipients quickly identify the purpose of the email and respond accordingly.
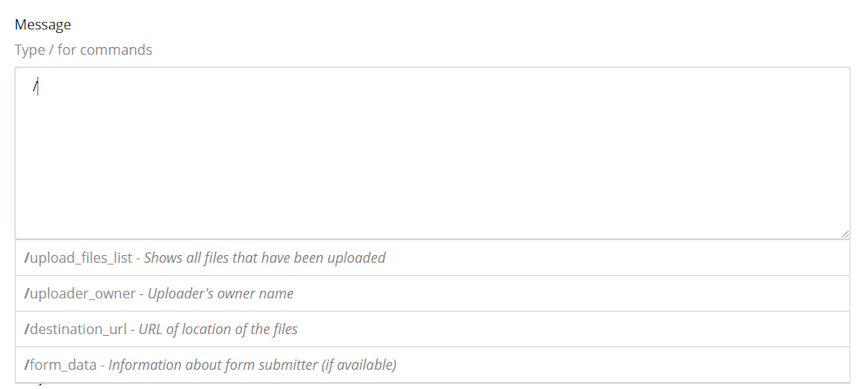
Customize the message body
- Enter your custom message.
- You can include the following variables:
- List of Uploaded Files – Displays the names of all uploaded files.
- Uploader Owner – Shows the uploader owner.
- Destination URL – Provides a direct link to the uploaded files.
- Form Data – Includes details submitted by the uploader (e.g., name, email).
📌 Example:
Hello,
The following files have been uploaded:
- /upload_files_list
Owned by: /uploader_owner
Download link: /destination_url
Submitter details: /form_data
Best regards,
DriveUploader Team
Adding detailed information ensures that recipients have all the necessary details without needing to log in to DriveUploader.
3. Enable notifications for submitters
If you want to notify the person uploading the files, follow these steps:
- Enable the Send a notification to the person who uploads when finished option.
- Customize the subject and message just like the admin notification, using the same variables.
📌 Example:
Subject: Your Upload to /uploader_name is Complete!
Hello,
Thank you for uploading files to /uploader_name.
Uploaded files:
/upload_files_list
You can access them here: /destination_url
Best regards,
DriveUploader Team
Why enable uploader notifications?
- Confirm that the upload was successful.
- Provides the uploader with access to the uploaded files.
- Helps reduce unnecessary follow-up emails or confusion regarding upload status.
4. Save and test your notification
- Click Save to apply the changes.
- Perform a test upload to verify that notifications are sent correctly.
Testing notifications is crucial to ensure that all email recipients receive the intended messages. You can use a dummy email address to check formatting and variable placements.
5. Troubleshooting common issues
If notifications are not working as expected, consider the following:
- Check the email addresses: Ensure all recipient emails are correctly entered without typos.
- Verify spam folders: Sometimes, email clients may classify notifications as spam. Ask recipients to check their spam or junk folders.
- Ensure proper use of variables: Make sure variables such as /uploader_name and /upload_files_list are correctly used in the subject and body.
- Test with different recipients: Try sending notifications to a different email address to see if the issue persists.
With this setup, both admins and uploaders can receive fully customized email notifications, ensuring clear communication and streamlined file management. 🚀 By leveraging these notifications, you enhance efficiency, improve workflow tracking, and create a more organized file submission process.