How to create an online form for collecting the information
Data collected from customers is the most valuable thing a company can get. The ability to obtain this data easily and quickly change it to suit your needs is also a great advantage. DriveUploader offers a fully editable form that you simply create using FormBuilder. You can show the form to your customers before each upload, allowing them to describe the uploaded files in detail.
Before you begin
To create the form you need our PRO plan. Using this plan, you can also use our JavaScript API to save files to your shared Google Drive. Discover our plans & pricing.
Create an uploader
The first step to creating a form is to create the uploader itself. You can learn more about creating new uploaders here. If you already have an uploader created, you can add a form to that uploader without having to create a new uploader.
Activate the form
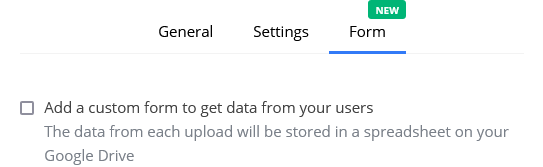
If you have already created the uploader, you can proceed to create the form. On the admin page, select the uploader for which you want to create a form by clicking on the "Edit" button.

On the open page, you'll find the normal uploader settings you're used to and a new "Form" tab where you can create a form. Check the "Add a custom form to get data from your users" box to activate the form before each upload.
Build your form
In the following steps you can configure the form according to your needs.
Spreadsheet
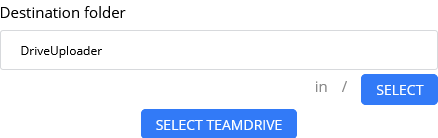
In the first step, it is important to set the destination of the Google Sheet file to which all data from the form will be saved. You can select a location on your personal Google Drive or a Shared Drive (called Team Drive in the past). Please note that if you use a personal Google Drive, the email address of that account must match the account you use for DriveUploader.
Form fields
You can then start creating a form to suit your needs. You have several field types to choose from and you can combine them freely. The number of fields is not limited.

- Field type - You can choose between Text, Text area, Dropdown, Checkboxes and Multiple choice fields.
- Field label - Choose a name for each field, this name will be used as the column header in the Google Sheet.
- Required - Select if this field is mandatory to fill in.
- Delete - Removes the field from the form.
Use data from the form
Equally important as the data collection process is the use of the data. Thanks to automatic storage in Google Sheets, you can process the completed data very easily and efficiently. The file with this data is stored according to where you have selected its destination in previous step.
All data from the form is saved in the selected document in the exact format. When uploading multiple files at once, a new line is created for each file contained in that group of uploaded files. The same form data is used for each file.
File structure
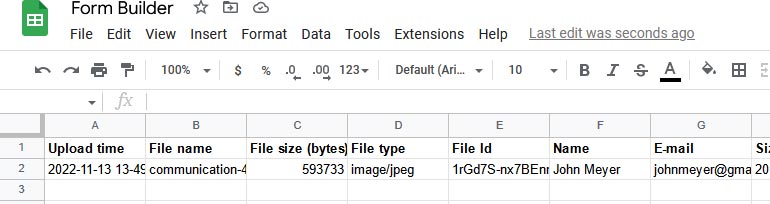
In the image below, you can explore the structure of a document that is populated with data from a form. Row 1 in bold is the header of each column. The first 5 columns are default, the same for all forms, the following columns already represent fields from the form. The name of these fields is then the same as the name of these columns.
Default form fields
Values set by the system that cannot be influenced by the user.
- Upload time - Automatically added exact upload time
- File name - Source name of the uploaded file
- File size - Uploaded file size in bytes
- File type - Automatically added file type according to its properties
- File Id - ID of uploaded file
Custom form fields
Values set by the system that cannot be influenced by the user.
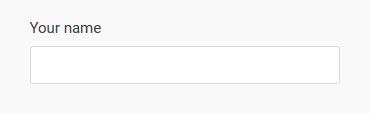
Text - Field for short text input, the label "Your name" was used when creating the form
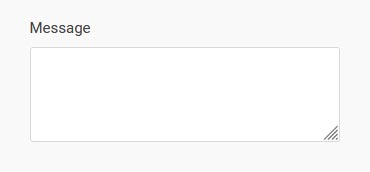
Text area - Field for longer text input (Only affects the size of the field in the form, does not affect the cell in Google Sheets), the label "Message" was used when creating the form
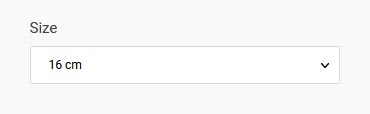
Dropdown - A field where the user selects one of several options from a dropdown menu, the label "Size" was used when creating the form
Checkboxes - A field where the user selects one or more of several options using checkboxes, the label "Addition" was used when creating the form

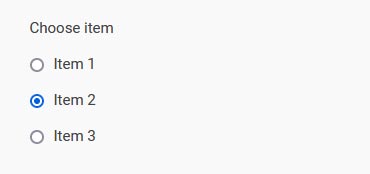
Multiple choice - A field where the user selects one of several options from bullet points, the label "Choose item" was used when creating the form